How to Clean and Maintain Your Microphones
Keeping audio gear maintained is a crucial part of any audio engineers job description. Clearing the dust from amp filters, fixing cables and the like. One thing most church techs forget about is cleaning and maintaining their microphones. There have been times I’ve consulted at a church, tested their microphones and been amazed how much gunk and honestly, the stench coming off of them. Let’s face it, we’re all human and sometimes we get coffee breath or forget to brush our teeth in the morning.
How to Clean and Maintain Your Microphones
You will need:
- Mouthwash (I prefer Listerine or something else poewrful!)
- Toothbrush
- Paper towels
- 2 small cups
![]() Step One
Step One
 Step One
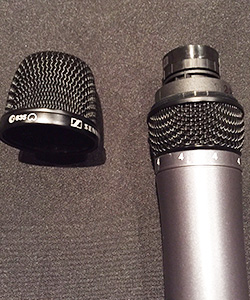
Remove the grill from the microphone and set it aside, put the microphone away. Most mics will have grills that can easily screw off. Its crucial that you keep the microphone intact, if you screwed off the element, you screwed off the wrong piece. The last thing we want is to get the microphone near moisture.
Step Two
Remove the foam filter from the metal grill. This can take some work, sometimes the foam filter doesn’t want to come out, but it will with a little persistent persuasion.
![]() Step Three
Step Three
 Step Three
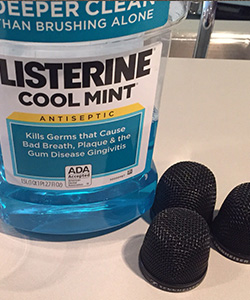
What’s a better way to kill bacteria and buildup than what we use in our own mouths? Mouthwash is both sanitary and it’s safe just in case the singer puts their mouth on them immediately after cleaning. Fill a cup with mouthwash and put in all of the foam filters, set the cup aside and let them soak.
![]() Step Four
Step Four
 Step Four
Get some hot water running, hand clean the metal filter using the toothbrush to get out any particles of food or lipstick that have gotten stuck. I know some people who will put the metal grills into the dishwasher, but I’m not a fan of this method. If you have grills that are painted (like mine) the paint can chip off. Set them aside on a paper towel to dry.
![]() Step Five
Step Five
 Step Five
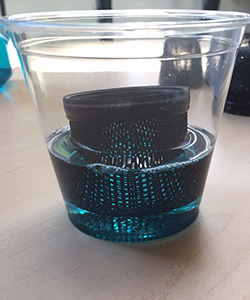
Put a small amount of mouthwash in the second cup, just an inch or so from the bottom. Dip the tip of the grill into the mouthwash and leave it there for about 30 seconds. You don’t want to leave them in for too long because as I stated earlier most are either painted or polished chrome and it can damage the finish of the grille. Take it out and put on a fresh paper towel to dry.
Step Six
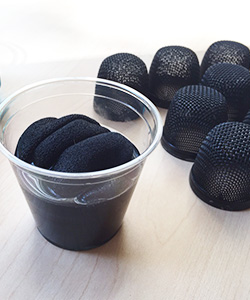
Dump the mouthwash from the first cup, and ring out the foam filters. Don’t rinse them with water. Fold them into paper towels and squeeze them hard to get as much of the mouthwash as you can.
Step Seven
Put all the slightly moist foam filters and metal filters in a warm spot. I put them in a cardboard box outside on a hot day, Its been upper 90’s here in Kansas so it’s a great time. I put them in the box so that they don’t blow away with the wind. You want to dry out any additional moisture you couldn’t get with the paper towels. Over the winter I put them in our amp room, which runs about 10-15 degrees warmer than the rest of the building.
Step Eight
After a couple of hours, go grab the filters from their drying spot and reassemble them with the rest of the microphone.
Be sure to put the mic up against your mouth and take a deep breath in. My vocalists LOVE when I clean the microphones. It is also a way to show the band that you care about them. They’ll see the fruits of your labor and you’d be amazed at how incredibly appreciative they will be. Use your best judgment on how often to clean them based on how many events you do a week or a month. We are a pretty active campus and host a lot of outside events, so I do this about once a month, or before a big event. Enough that my vocalists never smell anything but minty freshness.